Bondage Hardware Special Part 4 – Accessories

Welcome to the fourth part of the Bondage Hardware Special. This article will be about all the things you might not necessarily think off when you plan a bondage scene. Yet there are many scenarios where these things are nifty or even essential.ToyTorture.com has always been a website offering advice and information for people just starting out in the scene. So for the experienced player many things might be standard dungeon equipment and thus are trivial bunt since I wanted to give an overview about all things I consider important please bear with me. You might find something you have not though off yet.

Juggling Balls, Bells, etc.

Especially when bondage aficionados think about scenes the scenario can’t be too strict and inescapable. As tempting as this scenario is especially when it comes to gags it has a safety risk because the sub can’t articulate a safe word anymore. One way to get around this is giving him something to hold onto that he can drop if he needs to articulate a concern. This can be a juggling ball or a bell if the top wants also an acoustic alert.

I know that this is kind of a crutch because in some scenarios like sleepsacks or straightjackets an object can’t be hold and focusing on holding onto something might keep a sub from really going under into the headspace. But especially when playing with new kinksters just starting to venture deeper into heavier bondage I find an additional safety line a good way to establish trust and confidence.

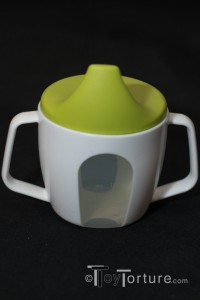
A Sippy Cup from IKEA

A Sippy Cup from IKEA

Sippy Cups

Especially when it comes to stress or heavy gear bondage people subs tend to sweat a lot so it is important to stay hydrated. Being in a bondage predicament however limits the possibility to drink properly. The sub either spills the liquid or the water flows into his mouth too quickly making him choke. I found sippy cups like the ones used in retirement homes or nurseries a good and secure way to provide the sub with water. I have experimented with drinking straws but was not too impressed.

Human Waste Disposal

Everything that goes into the body has to leave it at some point of time. Especially when it comes to long term bondage this might pose a problem because when nature’s urges call you are not able to get out of the bondage in time or you don’t want to.

  1. Urine Bottles
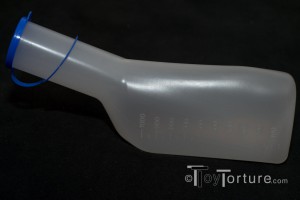
    A Non-autoclave Urine Bottle

    A Non-autoclave Urine Bottle

    Developed for people who can’t go to the bath room these bottles are designed to allow easy pissing into them. However in some bondage configurations or with some smaller dicks it can be a challenge to piss into them.

  2. Diapers
    In this case I would recommend diapers. They are also handy when you pack the sub so well that his dick can’t be accessed or if the bondage scene lasts so long that feces might be become an issue. There are different kinds of diapers out the. Traditional diapers made for adults can take considerable amounts of feces and piss without leaking. However they need to expand in order to work properly so take this into consideration when fettering around the crotch. If you just expect not too much urine there are thin diapers out there for people with bladder problems that can’t handle too much liquid. While adult diapers are usually sold at pharmacies you can get the latter kind of diapers in most drug stores.

Cover

Another body fluid that can cause problems is sweat. Again a problem with long term or gear bondage (particularly rubber gear) sweat can leak out of the gear which is especially annoying when you are playing on the bed you want to sleep in later.

  1. Pool Liner
    Available in most kinkster’s favorite color black and widely available at hardware stores this tarp is water proof. However it just keeps the water from sinking into anything so be careful when getting up or moving the tarp in order to get rid of the liquid.
  2. Towels
    I though this would be a no-brainer but many people are actually surprised when they see a stack of towels on my play cart. So this is a reminder that it is wise to have towels accessible in your playroom. For bondage place a once or twice folded one under areas where leakage is possible (p.e. when rubber gear ends or under non-waterproof zips of sleepsacks), use them to soak up spilled liquids or just keep them ready to rub the sweat of the sub when he has gotten out of the gear.
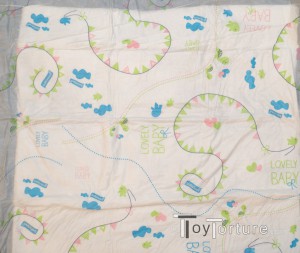
  3. Back Print of a Changing Table Cover

    Back Print of a Changing Table Cover

    Changing Table Covers
    When you are like me living in a dorm room the two options above are kind of difficult to live with. Tarps need to be laid out in order to dry which is a challenge in small spaces. Towels also need to be washed and dried which in some dorms (like the one I stayed during my exchange year in the USA) is not as easy as it might sound. My suggested solution for this are changing table covers. They are designed to soak up liquids and be disposed afterwards. Besides bondage I used them for fisting scenes in my bed. Just place one under the ass and you don’t have to worry about lube dripping out of the bottom’s ass. Changing table covers are quite inexpensive yet they are not too large and most of the time come with prints appealing to babies. There are also bed covers for incontinent adults which are larger yet unproportinal more expensive.

This article was about nifty but not necessarily crucial objects. Next week will be about security hardware which I consider a must!

Bondage Hardware Special Part 3 – Connection Hardware

In the first two parts of this Bondage Hardware Special I presented to you means how to attach subs to themselves, each other or furniture. This article is about all the hardware you can use to connect different means. This hardware is especially useful when using Rope Substitutes I talked about last week because unlike rope in most cases you can’t simply tie a knot to connect two or more straps.

Two Versions of Uncertified Aluminum Carabiners

Two Versions of Uncertified Aluminum Carabiners

Before I talk about the different kinds of connection hardware I first need to talk about an important term when it comes to bondage equipment: The breaking load. It measures the amount of force an object can withstand without giving in. The certified breaking load has often two measurements: The static breaking load measures the amount of weight that can hang from an object without giving in, the dynamic breaking load gives the amount of moving (p.e. swinging) weight a piece of hardware can deal with without failing. In most cases the breaking load differs between an open and a closed gate and in which direction the force is applied. The breaking load is measured in Newton (N). One Newton is approx 100g on the earth’s surface. This is why most of the time the breaking load is measure in Kilo Newton (kN) which equates approx. 100kg.

The breaking load is important for liability reasons. If you use uncertified equipment and something happens it is possible that your insurance will not cover for you. Most of the time a breaking load is certified for a specific piece of connection hardware but it states explicitly on the packaging that it is not made for supporting humans. This is a legal grey zone: Yes, theoretically insurance companies can deny your claim if something happens because the hardware was not certified for human usage but I have never heard of such a case.

Carabiners

Carabiners are probably the most often used piece of connection hardware. They are a wire bend into roughly oval or triangular shape with a gate to open it. Usually a spring keeps the gate closed if you don’t apply pressure. They are made out of stainless steel, steel, aluminum, titanium, carbon fiber, composite and plastic.

Carabiners come in many different forms which sadly are not all made for human bondage.

  1. Clips
    An opend Pear Clip where you can see the Sharp Edges of the Gate

    An opend Pear Clip where you can see the Sharp Edges of the Gate

    In Germany this type of carabiner is also called “Hardware Store Carabiner” because you can get them in a hardware store quite cheaply. Despite being used in many playrooms I would not recommend them for BDSM. First of all there is the breaking load. In order to get a static breaking load larger than quarter of a ton which in my opinion is the minimum for fettering humans you have to buy pear clips with the size 90x9mm and up which have been manufactured under DIN 5299. Second their general design is in my opinion bad for gear play. The end of the gate is an arrow-shaped hook that locks into place between two noses. These elements are quite sharp. In a good case they just scratch your gear buy I have seen rubber gear tear from the sharp edges. Despite the disadvantages I will not condemn them. I am not a big fan of them yet due to economically reasons I use them p.e. for attaching chains to attachment points when I am sure that I won’t exceed the breaking load. When using them just keep the potential problems in mind.
    Besides the steel clips there are non-certified aluminum ones which are great for attaching things like weights to parachutes.

  2. Climbing carabiners
    Three Different Versions of Climbing Carabiners with the Bracking Load Printed on them

    Three Different Versions of Climbing Carabiners with the Bracking Load Printed on them

    You don’t have to worry about these problems when you buy climbing carabiners. They are made out of aluminum and thus are light weight. Being made to support human beings even when falling down their dynamic breaking load exceeds 4kN in most cases and thus is more than you will ever need. Because they are designed not to damage rope they have no rough edges so no need to worry about your gear. You can get climbing carabiners in many different designs which fit different needs. They are pricy though but definitely gear you will keep for the rest of your life. A bonus is that unlike the steel clips you can get them in many different colors to fit your personal style.

  3. Panic Snaps
    This kind of carabiners will open even when there is force pulling onto them.

    Left: Saddle Panic Snaps Right: A Sailing Panic Hook

    Left: Saddle Panic Snaps
    Right: A Sailing Panic Hook

    They are used for any situation where you would to have to life the sub in order to the d-ring out of the carabiner p.e. the wrist restraints used for above the head fixation on a St.-Andrews-Cross or any form of suspension bondage.
    Panic snaps come in two varieties: The ones for sailing and the ones for animals. The sailing ones have an eyelet at the bottom and on top a gate that is hold shut with a pin. If you want to release the gate pull out the pin. The ones for animals come in again on two varieties: One for dog leashes and one for holding saddles. The two varieties are hard to distinguish but are naturally quite different in breaking load! So I recommend the sailing panic snaps because they are made out of stainless steel (no problem at piss parties), they are lighter and smaller. If you take the smallest sailing panic snap you will probably need an additional shackle you put through the eyelet in order to make it larger.

  4. Stainless Steel Double Ended Carabiner

    Stainless Steel Double Ended Carabiner

    Double Ended Clips
    As the name of the carabiner already says it has a clip on each side connected by a metal bar. They have a very low breaking load. However I like them a lot especially for beginners. If you get well-made stainless steel ones they have no rough edges so your gear is not in danger. Further more in most situations the subs can open them by himself thus freeing him.

Left: Shackle with Breaking Load of 4.600kn Right: Shackle with a Breaking Load of 0.25 kN

Left: Shackle with Breaking Load of 4.600kn
Right: Shackle with a Breaking Load of 0.25 kN

Shackles

Another piece of nautical hardware very well fitted for bondage. Shackles are made out of stainless steel wires which are bend either in ¾ of a circle or two parallel straights with a half circle at the end. On the other end there is a pin which is screwed into a threat closing the shackle. Theoretically a shackle can do the same things as a carabiner but through having to twist in order to close it I find it more practical when I want to connect two things more permanently or when an eyelet is too small.

Screw Links

An even more permanent connection are screw links. They are made out of metal wires and come in oval or triangular shapes. On one side is a sheath with a thread on one end. If you unscrew the sheath it will open a recess. Originally designed to connect two ends of a chain it can also be used to create additionally attachment points, extend a chain or enlarge a too small eyelet.

Pad Locks

While theoretically they are able to connect a D-ring to a chain p.e. I would not recommend using pad locks are connection hardware. In most cases the lock will turn that the force pulls on the body and the shackle. Pad locks with not designed to have physical stress in this position so it is likely that the mechanic inside will jam and you will need a bolt cutter to open the lock!

If you buy locks in order to close lockable bondage gear make sure to buy keyed alike locks! Nothing is more stressful when you need to urgently open a lock and can’t find the key. You can get keyed alike locks at every hardware or lock store. When I suggested getting keyed alike locks to some reader questions people were concerned if that would disclose them as perverts. I can assure you this won’t be the case. Asking for keyed alike locks is quite common for example for equipment lockers in gyms.

A Paw Rigging Plate

A Paw Rigging Plate

Rigging Plates & Stainless Steel Rings

Rigging plates is another piece of professional climbing equipment used to organize and attach different ropes together. They are plates made out of aluminum and sometimes out of stainless steel with holes for ropes. The most common form is the paw with a big hole and three to six smaller ones on top. But tor really elaborate designes you can get rigging plates with more than 20 holes. I use them for organizing my carabiners for suspension bondage so I just need to pull up the plate. A more profane usage scenario is attaching carabiners for a hogtie.

There are large stainless steel rings sometimes with a cross or a triscele in the middle out there called rope rings which fulfill the same purpose though with less organization. If you just want to create a hogtie or don’t want to suspend someone from the ring a stainless steel cockring also does the trick.

Zip Ties

An easy and disposable item for connecting bondage equipment are zip ties. They are plastic bands with a lock on one end and texture on the other end. Pull the textured end through the lock and the connection can’t be opened again. If you get professional ones you can get a breaking load up to 80kg per zip tie. So it only takes three or four to create a strong connection, but please bear in mind that the combined strength is lower than the individual strength added up.

There are versions out there that can be opened up and reused. They are not strong enough for bondage purposes. The same applies to Velcro cable ties!

A Hoist for one or two Ropes

A Hoist for one or two Ropes

Hoists

Not really connection hardware but since I don’t know where to put it else and I store mine along with my carabiners I will shortly talk about hoists here. Hoists are barrels mounted into a case with an eyelet on top. They are certified for being able to bear different amounts of maximum weight. Hoists are useful for suspension bondage: You can create the bondage while the sub lies securely on the floor and later pull him up. There are different types of hoists with up to six barrels. I made the experience than more than three barrels are not practical because the rope will tangle.

So much about gear and hardware to tie people up. Next week will be all about accessories that can be useful to make a bondage scene successful and as little messy as possible.

Bondage Hardware Special Part 2 – Rope Substitutes

This is the second part of the Bondage Hardware Special. While in the first part I talked about Rope in this text will be about all the different means you can use to fetter someone if you don’t want to deal with rope.

Tension Belts

Originally these belts were designed to secure cargo but are as equally good for securing human beings. They consist of a nylon strap which is attached to a lock through which you pull the strap in order to shorten and tighten it. Sometimes at the part of the belt where the lock is attached there is a loop through which you can attach a carabineer. You can get tension belts for fairly little money however I do not recommend getting the cheapest ones. Most of the time with cheap ones the end of the nylon strap is not welded so it starts to fray. Also more expensive ones are certified for a specific weight. When fettering a sub or using for suspension bondage I would not recommend for going anything lower than 200kg certified. While you can use tension belts on bare skin I would not recommend it. The edges of the nylon straps are sharp and the strap itself can create rope burn if the sub moves too quickly too long under them.

Bungee Cords

Another cargo securing device that can be used for bondage. They are made out of two hooks connected by a flexible cord covered in nylon fabric. Because they were designed not to secure heavy cargo you will need several bungee cords to achieve the same sense of bondage as you would with a single tension belt. However in this property lies the beauty of bungee cords. Even one single cord with produce down force that can be easily overpowered. But if you attached several ones the sub can struggle against the in his mind weak cords, maybe lift himself a bit but will ultimately fail. Theoretically you can use bungee cords for suspension bondage but I would not advise it. It is too hard to figure out how many you need in order to securely hang someone from the ceiling. Another thing to keep in mind is that the flexible cord over time will stretch and age so you have to check and replace the cords on a regular basis.

A Pair of Police Velcro Restraints

A Pair of Police Velcro Restraints

Velcro Straps

When I talk about Velcro straps I do not mean the cable binders you can buy for next to nothing at the office store but industrial grade Velcro straps that are at least 3cm wide; narrower ones cut too easily into the body. Velcro is again a great mindfuck material: It is regarded as easily to open but once you attach a long enough part of the hard side to the soft side it is impossible for a bound person to break free. You can quickly and easy secure a person quite well with Velcro straps especially when you use Velcro restraints made for the authorities. They come with a loop which makes tightening the straps easy. Doing so will require some practice because the two sides of the straps will quickly attach to each other leaving you with a twine you need to untangle first before.

Please only put the soft side onto the body (if you don’t want that extra sensation agonizing) because the hard side can create painful abrasions. Even the wider ones I would not advise to use for suspension.

The Mr S Hobble Belt

The Mr S Hobble Belt

Belts

The probably most widely available secure mean of bondage in the household. It can be made out of a variety of materials so in order to test if it is made for bondage check if the edges are hard and can harm the skin. Than close the belt, hang it onto a secure anchor point and hand yourself onto it. It is doesn’t break and the claps doesn’t deform, you can use it for bondage. Otherwise you need a new belt. There are belts out there which holes all around the belt which is handy. Other belts come with added bondage features like this one from Mister B that turns into four restraints, this one from Mr S with four D-rings or their Hobble Belt which is a restraint.

Chains

Chains come in a number of varieties. The only ones I would recommend for bondage are twisted link and rolo, either in torus or in circle, patterns. Both patterns are smooth enough to be used on bare skin and offer enough space in the links to attach rope, carabineers or additional chains. Today most chains are welded instead of forged so there is a weldseam on every link. Sometimes these seams can be have sharp edges so before you use chain on bare skin check the links for such spots.

A Runner Holding a Chain in Place

A Runner Holding a Chain in Place

Runner

Originally made for climbing these are nylon straps which are very securely sowed at the ends to create a loop. You can’t adjust the length of them. I mostly use them to create anchor points using a cow hitch. They are also good for suspension bondage if you want a similar length at all attachments points.

Shoe Laces

Another item that can be found in any household but I would only recommend softer and wider shoe laces like fat laces for bondage. Any other can cut circulation and are thus dangerous. Also: Most shoe laces are not designed to withstand too much force so I would not recommend using them for any bondage where much resistance is anticipated but they are great for genital bondage.

Tape & Saran Wrap

When you watch movies tape seems to be the bondage material of choice for thugs these days. And to a certain extend you can use tape for bondage however I would not advise it. First of all getting the tape of when there is body hair under it can be quite painful. It also takes some practice to wrap it right: Too tight and it will cut circulation, too loose and you can easily get out. Also, most glues used on tape, like the iconic duct tape, is water-soluble. So it the sub sweats too much or if you attempt to do a tape gag which is often seen in movies you are at a loss.

These problems do not occur with saran wrap. However you need several layers to make it strong enough to withstand some struggle. If you want to use these means for bondage I would recommend doing a saran wrap base layer and add tape to that. When choosing the saran wrap be careful what you buy. There is wrap that shrinks which requires special surveillance of the sub when you use it, especially for mummification!

In the next part of this series called “Connection Hardware” I will talk about the nifty little things which connect different bondage means without knots.

Bondage Hardware Special Part 1 – Rope

Welcome to the first part of the Bondage Hardware Special. You can find an overview of the different texts of this six part series here.

For many people rope is the first kinky toy they make contact with because it is widely available, inexpensive and with a little practice enables you to do quite secure and creative bondage scene. However with so many different varieties on the market I am starting out this special on bondage hardware with rope.

First a disclaimer: I am not good with ropes. I don’t have the patience (and frankly the hand-eye-coordination) to learn enough skills that I would find sufficient for a scene. Because of that I invested so much money into leather restraints. In order to get you the high quality of information you are used from my website I did extensive research and talked to experts. Also I want to clarify that I neither see any superiority in rope or leather restraints. A few decades ago people who used rope were looked down on because they could not afford leather restraints; today it sometimes feel a bit that people look down on other who “have to” use leather restraints because they cannot handle ropes. Both are valid methods of bondage which have a place in our diverse scene!

Materials

There number of different materials rope is made out of is nearly infinite. So this section raises no claim to completeness. I will cover the most common materials; if you have a question about a material I have not talked about just send me an e-mail.

Materials not usable for bondage

First I want to talk about materials that are not made for bondage. Especially after Fifty Shades of Grey a friend who works at the ER told me about a lot of injuries the resulted from using this materials. Most of them can be found in every house hold so when you are horny and nothing to fetter is around it is good to keep this list in mind to stay away from them:

  • Any kind of yarn
  • Clotheslines
  • String
  • Fishing or kite Lines
Twisted Monk Rope by Mr S

Twisted Monk Rope by Mr S

Material usable for bondage

These materials can theoretically be used for bondage and can be sorted into two groups: Natural and synthetic materials. The most common used natural material is cotton. It is soft, inexpensive and easy to care for. However through the smooth surface knots can travel and if you take one without a solid core knots can tighten. This problem doesn’t occur with hemp rope. Its rougher surface keeps knots in place and them from tightening. Hemp rope is more expensive, a little bit stiffer, when wet nearly impossible to untie and a bit complicated to care for. Natural hemp rope is too hard and too rough for play. In order to make it ready for bondage you have to boil it. After doing so it needs to dry under tension otherwise it will shrink. Once dried you need to oil it. You can get pre-treated hemp rope from Twisted Monk which Mr S just started stoking. It is one the more expensive side yet definitely worth the money. Besides hemp and cotton more or less common materials for rope are sisal, silk, bamboo, coconut husks, burlap and linen. I have seen all of them used for human bondage though they all have their different weaknesses and strength and are hard to come by in a quality that would allow to fetter a person without danger. So if you want a natural material, stick to cotton and hemp.

Besides natural materials they are countless polymers spun into rope. It is impossible to cover all so here are two variants I could advice using: floating rope used in sailing and soft nylon rope. The advantage of synthetic material is that it mostly comes certified for a certain breaking load so you can easily asses if it fits your profile. To check if it should be used for bondage please take a look at all the properties listed in next paragraph. An advantage of synthetic rope is that when you shorten it you can easily weld the ends so it doesn’t fray. Natural rope has to either be sowed properly, whipped (thin yarn spun around the end of the rope) or put a polymer shell like shrinking tubing over the end and weld it.

Mister B Cotton Rope

Mister B Cotton Rope

Rope properties

The property of rope is defined by six major factors which determined whether a rope should be used for bondage or not. I strongly advise to either inspect the rope in store before you purchase it or order a sample to check if you like the rope. As always it is wasted money to buy rope you do not really like because good cared for rope will last you a lifetime!

  1. Construction
    There are two common ways to make rope. First there is plaited rope that comes in three varieties. One of them is squareline which produces a roughly rectangular rope. It is mostly used for haswers and thus through the thickness and weight not made for bondage. I have seen thinner versions which could theoretically be used for bounding someone. However its knot properties are bad so I would not recommend using it. The next one is hollow braiding. This kind of rope is made out of weight bearing threads and hollow inside. This makes it ideal for splicing which is opening up the rope. A disadvantage of it is that knots can travel or even tighten so I would not recommend it. The last variety is core-mantel-braiding. A strong, weight bearing core is surrounded by a woven mantel that protects it from abrasion and environmental influences. The cores come in soft and hard varieties. Only the soft one is made for bondage (see: 3. Flexibility). Depending on the mantel material knots can travel with core-mantel-braided rope.
    The second common was is the one most hemp and cotton rope is made: It is twisted rope. It is made by spinning threats of alternating rotational direction under tension. I prefer this style of rope because knots neither travel not tighten with it. However it cannot be spliced.
  2. Surface
    A common problem of using “wrong” rope is so called “rope burn”. It is irritation of the skin when rough rope travels over it to quickly so through the friction it gets hot; hot enough to create real burns! In order to prevent rope burns the surface of rope should be smooth and soft. Sometimes especially with syntactical rope the surface might appear smooth but the gaps between the individual threats are large enough to create rope burn. So before purchasing grab a piece of rope and quickly pull it over the palm of your hand. If it gets uncomfortable or too warm, this rope is not made for bondage!
  3. Flexibility
    In order to wrap rope tightly around a body and place knots where you want or need them rope has to be flexible enough. It can easily be tested by tying a simple figure-of-eight knot. If you can’t tighten it without much force, the rope is too stiff for bondage. A good rule of thumb is that the thicker the rope or the tighter it is made the less flexible it gets.
  4. Thickness
    Bondage rope comes in four major thicknesses, all for different purposes.
    4mm: Best for tie off body areas, p.e. genital or breast bondage. Not really made for body bondage.
    6mm & 8mm: Made for all bondage purposes. It is kind of a dogmatic question whether you think 6mm or 8mm is ideal for bondage.
    10mm: Also made for all bondage purposes but a bit too thick for “practical” bondage in the playroom. It has more presence on the body so it is best used for pictures.
    Any thickness below 6mm will dramatically increase the likelihood of tying off limbs so only use it for controlled scenarios like genital bondage. Anything below 4mm I consider too dangerous to be used on human beings. If you go above 10mm thickness most rope becomes too stiff. While it is not dangerous to use it is in my opinion a too much pain in the ass to be used for scenes.
  5. Breaking load
    In a nutshell Breaking load measures the loads under which a certain material will break (I will talk more about breaking load part three of this series). If you stick to rope thicker than 6mm you will have no problem with breaking load regardless of the material as long as you are not using a single rope for suspension.
  6. Maintaining
    As every toy most kinds of rope need to be cared for in order to bring you long lasting joy. After having been exposed to body fluids I recommend washing your rope using a fine detergent, low temperature and storing the rope in a pillow case. While you can hang cotton and synthetic rope just onto a cloth line and let it dry, most other natural fibers need care (p.e. hemd rope need to dry under tension, pulled through a carabiner once dried in order to soften and finally being oiled) before they can be stored away.
Mister B Split Rope

Mister B Split Rope

Beyond these properties there are also ropes with added features out there which might make your bondage experience easier. Mister B offeres pre-spliced cotton rope for easier bondage. In sail stores you can find rope with metal reinforced eyelets or with shackles attached to the end.

Rope Lenght

This chapter is again a dogmatic one: Which rope length do you need to bondage? Depending on what kind of bondage you want to create different lengths are good for you. I would generally not recommend buying ropes longer than 10m because they are too difficult to handle. Better learn a simple knot to connect ropes and thus connect different tied body areas instead of trying to handle one long one. With this you can of cause incorporate different colors into your growing web. I did a little survey under my rope dedicated friends and the consensus is that this is a good set to start out with: 2x 10m, 2x 5m, 2x 3m. Because your rope collection will grow as you get more experienced and do more elaborate bondage I recommend purchasing rope from a source where you are certain that you will get the same rope even after a few years so you can maintain a set. This is the case with most sail stores, roperies and special bondage rope vendors like Twisted Monk.

Rope Storage

Theoretically you can just throw dry ropes into a container for storage. However I would not recommend it. First it is disrespectful towards the toys and second – for most people probably the more important reason – it can tangle up there. While you can just coil rope for storage I recommend daisy chaining it (here is the Wikipedia article and a YouTube tutorial how to do it). Daisy chained rope does not only look stylish but it also takes up less space, can be transported in a bag without tangling and you can instantly find the middle of the rope which is handy for some bondage purposes. It takes some practice to learn daisy chaining but once you got it you can quickly and easily store make your rope storable.

Stephan Niederwieser's "Tie Me Up"

Stephan Niederwieser’s „Tie Me Up“

Learning the Ropes

Rope bondage is not hard to learn. You don’t need to know many complicated knots; two or three easy ones are enough for most situations. There are a lot of videos on YouTube that will teach you all kinds of rope bondage from simple to elaborate. However the quality of the video content varies from outstanding good to outstanding dangerous. Also, I am not a big fan of videos because it continues running and is already two steps ahead while you still try the first knot. But if you want trusted video tutorials visit Midori’s Vimeo page.

I personally would recommend books to start out with. If you are German spoken I highly recommend “Bondage – Der Gefesselte Mann” from Tom Schmitt. It is the classic, a little dryly written but no non-sense. If you like it a bit more pornographic get “Tie Me Up!” from Stephan Niederwieser. Both are explicitly for gay men. Mr S and Twisted Monk carry a few books and even DVDs on bondage which seems to be targeted at men and women. And of cause there are Midori’s books on Japanese bondage.

Since rope bondage is the entry into the kink world, in most metropolitan centers you can find courses. In Germany I can recommend the rope bondage workshops of the MLC in Munich and Quälgeist in Berlin. If you are in the USA and really want to get into rope bondage visit one of Midori’s Rope Dojos which take place twice a year.


In the next part of this series “Rope Substitutes” I will talk about the means to tie somebody down without rope.

Playroom Essentials: E-Stim Cables

This article shall give you an overview over the most common cables used in e-stim and what you might need them for. The first part of the article deals with the basic stuff that you need to connect your power box to electrodes from various different manufacturers. The second part shows some solutions for more elaborate forms of play.

While you can get most of the things from this article from the manufacturers of e-stim power boxes and toys or stores like Regulation or Mr S but you can also look at stores selling electronic components. Most of the time they are a little bit cheaper.

If you want to learn more about e-stim in general I have published a previous article on that topic. If you just want to know which e-stim box uses which connection standard read this article.

Basic Equipment

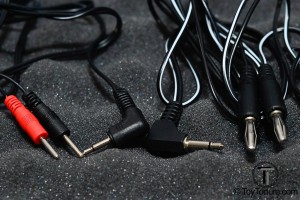
Left: 2.5mm jack onto 2mm pin lead Right: 3,5mm jack onto 4mm banana plug lead

Left: 2.5mm jack onto 2mm pin lead
Right: 3,5mm jack onto 4mm banana plug lead

Leads

They are the most essential cables you will need for electro play because they are used to connect your power box with the electrodes. They have a jack at the one end and a set of plugs at the other end. Usually there is a pair of plugs at the end, but there are also cables for more elaborate set-ups out there with four plugs. Depending on which system you are using they are combinations of 3.5mm jack and 4mm banana plug or 2.5mm jack and 2mm pin plug.

You can find so called “adapter” cables out there which mix 3.5mm jack with 2mm pin for example. They might sound handy but I would strongly dehort from using them! When you have different systems which mix all the different plugs and jacks I would identify the “major” system and use adapters (see below) instead of different leads. It will safe you a lot of money and space because adapters are lighter and more inexpensive than buying new adapter leads.

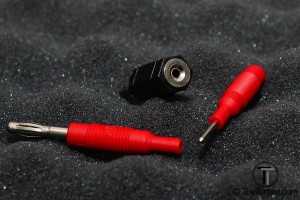
From left to right: 2mm pin onto 4mm banan plug adapter, 3.5mm jack onto 2.5mm jack adapter, 4mm banana plug onto 2mm pin adapter

From left to right: 2mm pin onto 4mm banan plug adapter, 3.5mm jack onto 2.5mm jack adapter, 4mm banana plug onto 2mm pin adapter

Adapters

Adapters are nifty little units which you can put onto jacks or plugs in order to change their form factor, for example turn a 4mm banana plug into a 2mm pin plug. They are used to incorporate toys from a different connection standard into your play set up or in order to save money and space on special leads when you have mixed standards in you power box outputs.

Advanced Play

Tri-Phase Cables

A special form of leads are so call tri-phase cables. They either come as special cables or as an adapter to connect two leads. High-end e-stim boxes like the E-Stim 2b or the ErosTek 312b have special programs which enables you to create three spot of sensations for which you need these kind of cables.

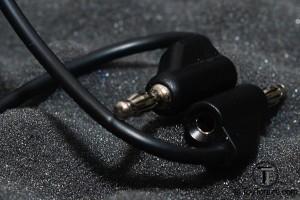
Detail of Measurement Line Plug-Jack-Unit

Detail of Measurement Line Plug-Jack-Unit

Measurement Lines

This kind of cables is a pervertable from laboratories. They are basically two sets 4mm banana-jacket-plug-combinations connected by a cable that comes lengths of 25cm, 50cm and 100cm. You can use them to daisy chain multiple electrodes or use one electrode with different power boxes. The effects using measurement lines are hard to explain and the play is for the more experienced e-stim player so I recommend you play around with yourself a little bit before you put elaborate constructions onto your sub.

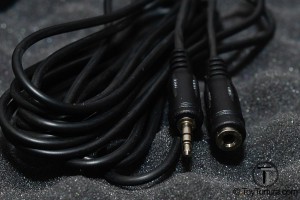
Detail of a Audio Extension Cable

Detail of a Audio Extension Cable

Extension Cables

The play space or even electrode layout can require you to place the electro box farther away than your leads are long. In this case you can use extension cords to deal with the problem. They come in two varieties: The first are jack cables used in audio installations and come in a variety of length. Some systems like Mystim don’t use 3.5mm or 2.5mm jackets are output jackets or sometimes only one pole is quite far away. In this case you need extension leads. They are cables with a matching jacket and a plug of the connection system you use.


Left: Isolated Pole Connetion Clamp Right: Unisolated Pole Connection Clamp

Left: Isolated Pole Connetion Clamp
Right: Unisolated Pole Connection Clamp

Pole connector clamps

Sometimes you want to incorporate metal toys like ball stretcher, cockrings or metal plugs into your electro play that were not made for e-stim. In order to connect them to your box you need pole connector clamps. They come in either isolated or not isolated varieties. Being another pervertable from laboratories they only come with 3.5mm jackets.

What they are not made for are to be put on different nipples! This kind of play is dangerous and potentially lethal!

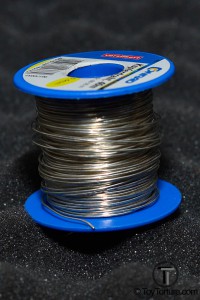
Barrel of Silver Covered Copper Wire

Barrel of Silver Covered Copper Wire

Silver Coated Cooper Wire

A challenge to incorporate the metal toys mentioned about is finding a space to place the pole connector clamps. To overcome this challenge wrap silver coated cooper wire securely around a metal part of the toy you want to use as an electrode and attach the clamp to the wire. The wire can also be used as an electrode by wrapping it around different body parts or let it travel over the sub’s body. But please keep in mind: With little contact area and little resistance even little intensity levels can have agonizing effects. So you can employ this wire as a substitute to conductive silicone loops if a sub maxes your box with them.

E-Stim 101

TENS vs Shocks

There are two types of electric stimulation used for erotic pleasure and torture: TENS (short for transcutaneous electrical nerve stimulation) and shocks. While shock devices like a violet wand or stun guns interacts with the skin, TENS units send electric stimulation through the body in order to stimulate the nerve endings. Both kinds of play have different safety and usage aspects to keep in mind when playing. This article is only about TENS units. While both kind of play are called e-stim I will use the term e-stim in this article as a synonym for TENS play.


Detail of the Inputs and Outputs of the ET232

Detail of the Inputs and Outputs of the Erostek ET232

How does E-Stim work?

In order to create a sensation you need at least two electrodes with different poles that don’t touch each other and are connected to one channel on a power unit. This unit generates electric impulses onto which usually wave patterns are modulated. These impulses travel from one electrode to another and stimulate the nerves in the area roughly around the electrode. Due to the way nerves are distributed throughout the body and the way they transmit information it is possible that the stimulation can be felt elsewhere, p.e. in your glans even though the electrodes are around the balls and the penis root. The sensation is felt stronger at the electrode with the lower the mass and/or the smaller contact area. If the difference between the electrodes is very large (p.e. using a big anal monopole and a small silicone loop) it is possible that the sensation is only felt at the smaller pole. Generally speaking it can be said the larger the mass and the surface area covered, the smoother the sensation feels yet the more power is needed to produce agonizing sensations.


Safety rules

Generally speaking E-Stim play is not more dangerous than any other form of BDSM as long as you stick to some basic safety rules:

  1. Do not use electric stimulation if you have any electronic medial device implanted like a pacemaker! The stimulating impulses of the e-stim box can cause male function or destroy the device which can be lethal!
  2. If you have any illnesses affecting your nerve system or heart, talk to your doctor where electro stimulation is possible.
  3. Use only devices which put out AC! There are power boxes out there for medical purposes which run on DC. They are only made to be used by experienced medical personal for medical purposes and NOT FOR PLEASURE! In a nut shell: The impulses of a DC currency will affect the cellular and molecular electrolysis. So the effects of letting DC run through your body are:
    • Denaturation of proteins
    • Destruction of cell membranes
    • Accumulation of metal salts in your body
    • Blood clotting at the anode, blood thinning at the cathode
    • Ultimately poisoning and necrosis
    • Unpleasant, burning sensation through static nerve stimulation
  4. PinWheelOverview

    E-Stim System Monopolar Pin Wheel

    Don’t let currency run over the chest! I am aware that this is a controversial topic because people claim it is safe as long as you use electrodes on the surface because currency always takes the shortest path. This assumption is dangerous! Currency always takes the path of the lowest resistance which usually is the shortest way but needn’t be necessarily. If through a form of day your skin transmits currency very badly yet there is a concentration of a very good conducting body fluid it will take this way even if your heart is in the way. Muscles are triggered by electric impulses and thus can also be affected by E-Stim. Your heart is one big muscle and exposing it to E-Stim can be fatal! The effect needn’t occur instantly; cardiac dysrhythmia can occur days after your heart being exposed to E-Stim impulses! So I strongly advise you to ere on the side of caution and:

    • Play below the waist freely
    • Place both electrodes on the same arm when stimulating this body area
    • If interested in nipple play, use ONLY BIPOLAR electric clamps and use a box with COMPLETELY ISOLATED CHANNELS
  5. Only use toys there are in perfect condition and fully functional! This should be natural and apply to all toys used but especially when E-Stim malfunctions it can produce very nasty effect. If something doesn’t work as expected don’t try to fix it during the scene but do something else and investigate when you have time and are not horny anymore.
  6. Be aware of unintended results of the stimulation especially when triggering large muscles! As I have written above muscle functions are triggered by electric impulses. So stimulation can trigger an unexpected and hard muscle function; I have seen subs involuntary rip restraints apart so play with a bit of caution.
  7. I generally recommend only to use your power box on battery. This limits the bad effects when something goes wrong to the voltage of the battery (mostly 9V) which might be extremely unpleasant but not dangerous.
  8. As a top never touch the both poles at the same time when not wearing protective (= isolating) gear. Currency usually takes the path lowest resistance which most of the time is the shortest and thus will most of the time run through the sub. However, there are configurations possible where the top get shocked and if the heart is in the way he will get exposed to the dangerous described above!


How to play

Electro play is a delicate play where only a little further twist of the knob can mean the difference between agony and ecstasy. So here are some guide lines I found sticking to useful.

Both rings attached to the power box

Ready-to-Play Set-Up of an inexpensive E-Stim Device

When preparing a sub for play I attach the leads to the electrodes, than put the electrodes onto or into the sub. Than I make sure that all channels are completely turned off, connect the box with the power source and than check again if the channels are off again. After I that plug the leads into the power box. Just for security reasons I prefer to run the boxes just on (the internal) batteries because they are limited to 9V (resp. 12V with the ET312b’s internal battery). It is highly unlikely that the PSU will malfunction but I prefer to ere on the side of caution.

When starting the stimulation I would recommend slowly increasing the intensity until the sub starts feeling a slight tingle. Depending on the form of day (p.e. the amount of sweat on the skin), the electrode and power box used, the body area where the electrodes are put onto and the program selected the intensity level needed to create a recognizable sensation can vary. So there is no general rule from which intensity level to start with. The same applies for breaks: A level that brought out the grunting horny pain pig might be excruciating even after a short break because the body’s pain memory and processing system calm down quite quickly. So after every break ease the sub into the sensation and stimulation level again. While the area in the brain which transforms pain into pleasure forgets quickly your nerves don’t. Thus it is normal to feel some buzzing sensation in the area where the electrode was placed for quite some time even after the electrode has been removed. This sensation can last for minutes up to hours.

If something goes wrong DON’T FIDDLE WITH THE BOX! Just pull the leads out of the box! Once no currency flows anymore the sensation stops!


What do you need to play

In order to create a sensation, you need a power box that creates the impulses, leads for connecting the box to the electrode and at least two poles in form of electrodes.

Power boxes

The power box is an electrical device that converts the DC which comes out of the power adaptor or the battery into AC. Inside the box is an amplifier which creates a pulsed electric pulse; a continuous pulse is rarely used because you can’t feel the difference but the battery would get drained more quickly. Onto these pulses a wave form is modulated. These are the patterns which are called programs and are the basis for an interesting stimulation.

The Erostek ET232

The Erostek ET232, an analogue E-Stim Box with two channels

Good power boxes have an amplifier for each channel. I would always recommend getting a box with isolated channels because not only do you have the full power on each channel at your hand but if your box is not faulty there is no unintended interaction between the channels. This is especially important when the heart lies between the electrode pairs. Most boxes have two channels which I find the most useful because you can stimulate the ass and the dick p.e. at the same time. There are inexpensive boxes out there with only one channel which are a good compromise for beginners. There are also boxes out there with four channels but I would not recommend them because they are difficult to operate.

Power boxes come with analogue and digital wave form modulators. There is no general saying which is better. Due to the form factor of the boxes made for erotic stimulation digital boxes most of the time allow more and complex manipulations. Depending on their processor their waves can feel a bit chiseled because they are only able to create stairs-like wave patterns and boxes with little processor power create large “steps”. Having a digital generated wave pattern enables accordingly programmed power boxes to end the wave pattern after one wave has been produced. This comes in handy if you want to train someone by letting him experience only a single wave. However digital boxes tend to be more expensive, especially the ones with more sophisticated setup options like the Erostek 312b or E-Stim System 2b. So I would recommend starting out with an analogue box and if you start to feel the limitations of the box in your play upgrade to a bigger box.

Some power boxes come equipped with an additional interface. The most common ones are an audio interface either through a line-in and/or a microphone or a shock sensor. Especially in combination with another box you can create evil setup (p.e. the louder the sub screams from stimulation of one box the stronger fires the other one and he can only break out of the circle when he gets a grip on himself).

Connection systems

There are two major systems for connection leads: 2.5mm audio plug onto 2mm pin used p.e. by MyStim, Zeus, Rimba, P.E.S. and most medical devices for home usage and 3.5mm audio plug onto 4mm banana plug which is used by ErosTek and E-Stim Systems p.e.. When starting your E-Stim toy collection I would recommend choosing one system for which you buy your leads and use adapters to incorporate toys from the other system into your play setup. Theoretically it doesn’t matter which system you choose. Practically I would advice you to use 3.5mm audio onto 4mm banana plug because it is the professional industry standard used p.e. for lab equipment. So most pervertables and inexpensive leads, adapters and splitters are based on this system. If you have a box from the other system buy 2.5mm onto 3.5mm adapters.

Electrodes

Electrodes can be divided in two categories: Surface electrodes and insterable ones.

The HML Bi-Polar E-Stretcher

The HML Bi-Polar E-Stretcher

Surfaces Electrodes

This kind of electrodes are used on the skin. Nowadays nearly every sex or BDSM toy comes in an electrified variety so you can get paddels, chastity cages, clamps, pin wheels, restraints, gloves, penis sheaths, ball crusher, humbler, cock & glans rings and ball stretchers as electrodes. Besides these erotic toys pervertables like electro pads originally made for medical purposes, modified anti-static bands or my beloved conductive silicone loops fall into this category.

Most surface electrodes usually have a limited mass and contact area so they mostly create a stingy sensation. Keep this in mind when choosing your toys: Some might look that they are great for tingling sensation play but the effect might be agonizing. Another attribute the majority of surface electrodes share are that they are monopoles by design. So when incorporating them into your play use them in pairs or combine them with another electrode or a bipolar one using a tri-phase cable. When doing so keep in mind that the direct path mustn’t cross the heart!

Three E-Stim System Bi-Polar Electro Plugs

Three E-Stim System Bi-Polar Electro Plugs

Insertables

I call all electrodes which are designed to be put into the body insertables. They come in two varieties:

  1. Plugs and dildos: They are made to be shoved up the ass (and for the few female readers also the vagina). There are a few monopoles out there which require a second electrode in order to work. But most plugs and dildos are bi-poles which also come in two varieties: One where the two poles are separated horizontally. With the right program they can create a fucking sensation. The other variety has the poles separated vertically. I haven’t experienced a quality electrode of this kind yet (the one I had was so crappy I won’t take the sensation as a reference) so I can’t really tell how the sensation will be. If you want to provide me with a review sample I would be very happy.
  2. Sounds: Designed to be put into the sensitive urethral they create a very intense sensation. They come in a great number of varieties: Mostly they are monopoles but there are also bi-polare versions out there, some are smooth, others are structured for an additional stimulation. Like when playing with non-electrical sounds it is paramount that the sounds are disinfected before play and used with sterile water based lube! Do not use special conductive gel (see next paragraph!). Also the surface must be flawless in order to prevent injuries!

Conductive Lube

In order to transfer the stimulation from the electrode onto the body there has to be a conductive medium between the electrode and the nerves. Since the body consists of a quite high amount of salt conductivity inside the body is no problem. However on the skin there is only a limited amount of salt from sweat, etc. Since these accumulations of salt are usually very concentrated the currency will flow only in limited areas leading to a stingy and quite strong stimulation. In order to prevent this you can use conductive solutions. There are special electro gels out there which are in my opinion a waste of money. Every water based lube which contains glycerin will work perfectly. I have conducted a blind test between conductive gel, Swiss Navy water based lube, ID Glide water based lube, Elbow Grease H2O and Aqua Glide and none of the probands noticed a difference. There are special sticky conductive lubes out there for attaching surface electrodes to the body. They provide some level of adhesion but they are designed for still sitting patients. Since your sub is probably going to be a bit more active I recommend saving the money on these special products, use normal water based lube together with adhesive tape.


I hope I have covered the most interesting and burning questions when starting electro play. If you have any questions, additions or suggestions please send men an e-mail.

Buyer’s Guide to Pup Gear

Ever since I started ToyTorture.com I have been asked why I don’t write about pup gear. There were two reasons for that: First I usually don’t write about fetish gear because there is no way to say that a is better than b when b makes you drool and a leave you cold. Second I am not into pup play and since I always try out the toys I write about myself and I don’t get the head space effect of pup toys I found no way to write about pup toys. But the mails and questions especially from kinkster just getting into the pup scene did not stopp. I have been woofed and growled at, my legs have been humped at events while asking for advice and I have been told that it would be totally pawesome if I wrote about pup gear. So as a Christmas treat (ok, enough now of the bad puppy jokes) I spent the last couple of weeks looking at pup gear, talking to pup players and I finally wrote this (Beginners) Buyer’s Guide to Pup Gear.

As always: If I have gotten something wrong or forgot something please let me know and help me improve this article.

Head Gear

What comes to mind first when you talk about puppy gear are the different puppy hoods. They come in two major styles: Full and open hood. Full hood encase the entire head. Since the pup play community has grown there are hoods out there for almost every breed of dog and they are made out of the major fetish materials rubber and leather. While the rubber ones come mostly only in classic black, there is a wide selection of different leather ones out there; just recently Mr S introduced custom leather puppy hoods catering to the most discriminating demands. Open hoods loosely resemble the style of head harnesses. They usually have a snout, ears and sometimes even a collar and come in rubber, neoprene and leather.

Not really specific puppy gear but purposes wise related are muzzles. Designed to keep the mouth of talkative subs or biting K9s shut they are more of a functional toy than designed to enhance the pup looks. You can get them made out of neoprene, leather or rubber, depending on your fetish and play style. The rubber muzzle from Regulation is quite sturdy but if you attach a leash onto it and the pup pulls to hard there is a chance that the rubber will tear. If the puppy is very active, stay with leather. I have talked to some guys who own puppy hoods and muzzles and they said that there are combinations where you can wear a hood and a muzzle. Sadly there is no general rule of thumb so if you want to wear both pieces of gear you have to try it out.


Tails

Another distinctive pup play toy is the tail. The most commonly used are tails that are attached to a butt plug. I would recommend the ones from Square Pegs because they are seamless and thus comfortable to wear even for a longer mosh or walk. They come in different tail shapes, colors and butt plug sizes. Choosing the right plug size is a bit difficult. I was told that it is useful to choose a plug one size larger than you can easily take because the tail stays in place even when you wag and romp without having to constantly pinch your sphincter. However the tail is of no use if you can’t insert it at all due to being too big. Another way of keeping the tail in place is wearing a special kind of harness.

This kind of tail has gained quite some popularity in the non-puppy ass play community: When you are wearing a tail while fucking someone the moving momentum of the tail gets transferred to the plug section which than stimulates the prostate.

If you don’t want to wear a plug-style tail Oxballs and Square Peg have recently introduced tails without the plug. The Square Peg one comes with a base and is designed to be put through a hole, or can be attached to a neoprene or leather harness, the Oxballs is designed to be attached to a special harness.


Collars

The origin of collars in the BDSM scene as a sign of submission and belonging come from the dog collars. So it is only natural that they fulfill the same purpose in the pup play community. Besides being an indicator they are also practical for attaching a leash or a dog tag.

Collars are probably the piece of pup gear with the widest selection of options. They come in nearly every material and color used in kink. Either coordinate it with your hood or harness or use the collar color as a hanky. If you want an inescapable feeling you can get locking ones or if you want some added play value I recommend getting a collar with more than one D-ring.

If the pup still needs training a shock collar might be the item to get. Especially for novice pups I would recommend shock collars made for BDSM purposes. If you choose one for dogs be real careful with the intensity. The electrodes and outputs are designed to even have a distinct effect when going through thick fur. Since with humans the electrodes touch bare skin on high intensity levels they can leave burn marks or cause nerve damage!

Mitts and Knee Pads

Since puppys tend to be on all fours while playing and the human being isn’t really made for this posture, protection is needed. Mitts are a little bit more fetish than security item. Usually a pup can see where he places his palms, so when choosing mitts the appearance is more important. The most commonly used types of mitts are either lockable bondage ones made out of rubber or leather which leave the pup at the mercy of their handler or mitts that have paw-like prints or cut-outs glued to the bottom. On the other hand knee pads are essential for long term pup play. When being on the knees for an extended period of time they provide comfort and protection, especially when walking around outdoor. They might not look sexy and I haven’t found ones yet tailored to the aesthetic demands of the pup community but every pup player I talked to highly recommended softly padded ones for every pup who enjoys kneeing and being on all fours for extended periods of time.


Harnesses

Finding the right harness for a puppy is a two step process: First you need to consider how active the puppy is. If you attach a leash to an active puppy via the harness its material should withstand greater forces so I would recommend buying a leather harness. Otherwise you can either choose rubber, leather or neoprene. The second question is the style: For a more “natural” puppy look I was told to rather take chest harnesses instead of full body harnesses. This doesn’t limit your options that much since in the last couple of years a lot of different chest harness styles – Bulldog, Pitbull, English, Top or Hunter – came out. Like with collars you can most of the times add a second color for piping to match the rest of your gear or express a certain preference hankylike.

Accessories and Play Toys

Once the puppy is full dressed in gear the is an endless amount of accessories out there. A good one to start with are dog tags so other pups and handlers can read the pup name. Besides the dog tags traditionally being made out of metal Oxballs designed cockrings with an attached dog tag so you can show your fetish even when being out in a club without and puppy gear.

When it comes to toys for the actual play, the possibilities are endless. The most common are dog bowls, bite and squeaky toys, either made for bio dogs or from special fetish manufacturers. Naming them all is impossible so I recommend going out to your local pet or fetish store.


Items designed for bio dogs

Some players want the real deal and buy stuff designed for bio dogs. In most cases they are a bit cheaper than BDSM toys and naturally of cause more authentic. But always keep in mind that they weren’t design for humans. Especially when it comes to collars they are designed to be worn over a thick fur so irritations are possible. If you want real dog gear I recommend trying it out even more thoroughly than you would do with normal BDSM gear even though that might get you some weird looks at the pet store.

What you should never do is eat real dog food! Most dog food has crushed bones mixed into in order to keep the teeth of dogs from getting too long. The human set of teeth and digestion organs are not design to deal with such food! If you want an almost dog-like appeal by dog treats, give the content to a bio dog and put beef jerky into them.

Buyers Guide to Restraints

About every other week I get a message asking me about different aspects of choosing the right restraints. So in order to get back into writing articles, I condensed the collected answers into this piece. If you feel something is missing or have a recommendation, feel free to send me an e-mail.


Materials

Restraints can be made out of any material that is somewhat soft and can withstand force. Because of that I will only cover the most common ones you will come across in most stores. Some special kind of restraints like Segufix or everything only made out of metal will probably be featured in a future article.

Leather

It is the most common material to make restraints out of. It is very durable if taken correct care off, will withstand force and is soft and gentle to the skin – if you take the right leather. The right leather means a more softer (and mostly thinner) hide on the inside (mostly calf, lamb or fine cow) and a thicker, sturdier hide on the outside (mostly cow, bull, swine, but also kangaroo or buffalo).
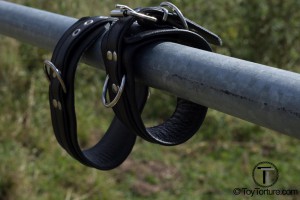
Leather Restraints

Leather Restraints

I would advise you not to be doing too much of kinky on a budget when purchasing leather restraints. First they are an investment that will stay with you for many years and you will use in almost every scene, secondly in recent years east Asian manufacturers discovered the kink market. Their quality of products ranges from shocking to fairly decent. The biggest issue with any leather toys from Asia are that most hides are treat with chemicals like Chromium to save time and money. You will most likely wear this kind of leather on your bare skin which can lead to allergies. And unlike jeans p.e. you can’t wash restraints 10 times in order to get the chemicals out of there. This will not be the case with every leather toy you will get from East Asia but it is something to keep in mind, especially when you shop around on eBay. I would always recommend investing a few bucks more and support a local dealer who knows where is products come from.

Fabric

Most fabric restraints are made out of nylon but I have seen cotton, canvas and even cevlar ones. They are lighter and smaller than leather restraints and are mostly on the lower end of the price range. This makes them good for starters or if you want to keep a little emergency set in your toy box just in case you forget you bondage bag. Depending on the material they are really easy to clean and disinfect.

Rubber

There are two types of rubber restraints out there: the one made out of soft latex that is also used on fetish wear and thicker, harder rubber (in Germany we call them „old tires“).

As much as I love rubber as a material general speaking but for a few exceptions rubber restraints are not made for hard play. You can restrict movement with them but if someone really struggles or fights against them, they will probably break (I have destroyed three pairs so far in my BDSM career). The thicker rubber ones are able to withstand more force but are also stiffer. You can find them for little money on eBay but most of the time they just cut rubber mats in stripes and added a few metal piece. But due to being stiff the edges are hard and can cause bruises when struggling in them. If you purchase such restraints in a dedicated kink store the edges will most likely be deburred which makes them less harmful but they still won’t be comfortable.

If you want more comfortable rubber restraints go for the latex ones. They are as soft as any rubber attire piece. Sadly the comfort is traded in for durability. The manufacturers try to deal with the issue by putting fabric tape between two layers of latex. I am definitely not the strongest sub in the world and a layer of fabric tape between two layers of 0.9mm of latex didn’t stop me from tearing them apart. I have talked to my local kink master mind at Demask in Dortmund and he told me that Kevlar as a fabric is really the only way to make durable simple rubber restraints. But Kevlar is a difficult material to work with as is rubber and latex overall. Thus the prices for rubber restraints are rather high compared to leather ones. However there is a big benefit with rubber restraints: unlike leather they can get a dirty and wet as you want them to be. So if you want to restrain yourself or your sub in the piss area (or nastier places…), I would advise using rubber or…

Neoprene

There a number of different neoprene variants out there all of which I have seen turned into restraints. Covering every one would be too much for this article so please check at Wikipedia which one works best for you. All kinds of neoprene are sturdier than rubber and can deal with dirty, wetness and can deal fairly well even with oils so they are the material you want to use in a gunge or oil scene.


Construction

Restraints consist of a body and depending on the closing mechanism also a strap.

The body is the part you wrap around the part of the sub’s body you want to restrain.

There are three ways to construct a body:

  1. One piece non-folded: In this case the body is made out of one piece of sturdy (and hopefully somewhat comfy) leather. When purchasing make sure that the edges are not sharp so there is no injury possibility.
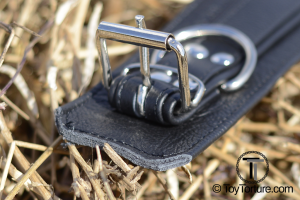
    Fold

    Trice Folded Leahter Restraint

  2. One piece folded: A folded one piece is made of a single piece of mostly a bit softer leather folded at least once so on one side you have a piping-like edge. The other side can feature a piping which is not really necessary when the leather is soft enough. Because a piping is always thicker than just a fold the restraint might look a bit imbalanced with piping just on one side. You will find a seam around the open side, good folded restraints also have a seam on the fold for added stability.
  3. Two pieces: Most leather restraints are a two piece construction with stiffer leather on top and softer leather (or fleece, fur, suede etc. as lining) on the inside. Between these layers padding can be added. Padding does not only make restraints more comfortable for long term wearing, they also can create pressure without cutting circulation when you tighten the restraints using a buckle (see below). Since you have two more or less stiff leather edges, good two piece restraints have a piping running around them to make them smoother. The advantage of piping is that it can be made in a different color this bringing a bit more color into your play bag or displaying your hanky.
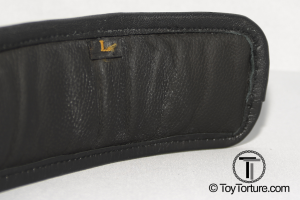
Padding

Padding on a Leather Restraint

Straps, buckles, D-rings, etc. are mostly held in place by rivets holding down a leather strap (I have seen them sewed down but I strongly believe that just some thread holding down a d-ring a sub is pulling isn’t a good solution). With every construction but the one piece non-fold it is a personal or design decision if you want the counter part of the rivet touching your skin. Since the rivets are mostly made out of stainless steel there is no medical issue with them touching the skin, but the sensation at least at the beginning is a bit different since they are colder and harder than the surrounding leather. Because of that

most of the time the counterparts are put between two layers of leather or below the padding (a prominent example where it isn’t the case are the Mr S Fetters USA Padded Locking Restraints).


Closing

The most common method to close a restraint is using a strap with different types of clasps:

  1. Roller Buckle on a two piece Leather Restraint with Piping

    Roller Buckle on a two piece Leather Restraint with Piping

    Buckle: Probably the most traditional closing method that works like a belt. Good buckles have a roller buckle which makes pulling the strap through the buckle more easily. The hole spacing determines how accurately you can adjust the restraints. If the strap is made out of more than one piece of leather the holes should be reinforced by metal rings so that the pin won’t accidently harm the edges of the hole. This is not necessary if you use a locking restraints with eyelets because the “pin” is round and smooth (see below).

  2. Double D-ring: On the end of the strap there are two d-ringthrough which you thread the strap.The advantage of this kind of mechanism is that the restraints can be adjusted steplessly.
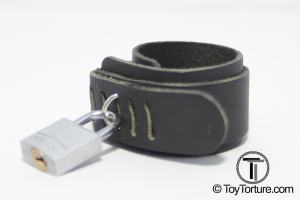
Bail closing with a 20mm padlock

Bail closing with a 20mm padlock

Not a clasp but still requiring a strap are bails. The strap has slots punched into it where you pull the bails through. In order to fix the restraints, you can use a carabiner or a padlock. Since the hole distance is mostly the same than with a buckle strap this kind of restraint is as tight as a buckle one but faster and locking. But you always need some hardware to close it.

If you don’t want to deal with a strap there are some restraints out there using (industry grade) Velcro. The advantage of Velcro is that it is easy to handle, steplessly adjustable and gives especially the newbie a sense of security (if something goes wrong, just pull it open).


Attachment Points

Once you have put the restraints on, you need to attach them to something in order to restrict the restraint person’s movements. I have seen restraints with just a leather loop sewed to the restraints. I am not really convinced that this will work because leather stretches out and as written under construction I don’t trust threads with holding down power subs. In my opinion the only real deal are D-rings. Most of them are made out of metal but I have seen ones made out of plastic. Because nowadays there are some amazing kinds of strong and durable kinds of plastic out there, I can’t really say anything against them. But I haven’t tried them out; if you have experience with restraints with plastic D-rings, please contact me.

D-Ring hold in place by rivets

D-Ring hold in place by rivets

The majority of metal D-rings are made out of stainless steel so they won’t break – if they are welded. In order to save money I have seen non-welded ones (on the bottom there is a little gap instead of a weldseam). If the force pulling on the D-ring is always directly opposite of the gap, this is no problem. But in most situation the force will pull on one or the other end thus pulling the D-ring open!

Regarding the number of D-rings that is really a personal choice. For “basic” restraints like wrist and ankle one D-ring per restraint is enough, but p.e. for a thigh restraint I would want at least three. General speaking more is better when it comes to the number of D-rings because it gives you more pervy options.


Locking

I know off two ways of building in a locking option into a restraint: the eyelet way and the Mr S way (I call it that way because I have only seen it used on restraints by Mr S). When using the eyelet way there is a small eyelet inside the pin of the buckle where you put a padlock through. The eyelet is usually big enough for a 20mm padlock.

Locking Buckle with Eyelet

Locking Buckle with Eyelet

The big downside of this method is that through the eyelet the pin gets fairly wide thus the holes in the strap have to be larger and can’t be reinforced by rivets. The last point is only a style thing: there is less metal on the restrains and the belt should be made out of a single piece of thick leather (s.o.). The first point is influencing play because due to the larger holes you can’t close the restraints in as fine pitches as with a normal pin buckle.

Mr S has found a solution for that: they take a normal pin buckle and put a stud with an eyelet behind the buckle. Once you have closed the strap in the buckle you fix the buckle in place over the stud and put a 20mm padlock inside the eyelet. Through this combination you can adjust the restraints finely and still lock it.


Types of restraints

Most people think of the leather cuffs for wrists and ankles when they hear restraints. But there are a lot of other cuffs out there so you can create a Segufix-like full body suspension: Cuffs for thighs, upper arms and belts for chest and hips. And for special purpose´s there are a ton of different special restraints out there like:

This list makes no claim of being complete because there are a lot of pervy minds out there creating new and exciting kink gear every day.


What restraints should I buy?

I have written this article to give a short (and probably incomplete) overview what aspects of a restraint impacts the play so you can make a decision what you want to look for when you shop around for restraints.

Double D-ring

Double D-ring

In my opinion even if you are a rope top you should at least have a pair of wrist and ankle restraints just in case you want to quickly suspend someone. If you are a sub you should own the perfect (and perfectly fitting!) restraints you want to have used on you so there is not disappointment when the top wants to restrain you and his don’t fit.

What specific restraints I would recommend really depends on your budget. You can get a pair of high quality leather restraints for around 50€ (like mine from McHurt), if you can deal with the uncertainty of the way the hides have been treated, pick up the ones from The Anubis Pack because you get entire basic set plus thigh restraints and collar for £56.If money isn’t really an issue I would recommend the locking restraints from Fetters USA from Mr S. I brought them over from the US for a friend of mine, they are great manufacturing and leather quality , are locking and have to D-rings, basically anything I would want in a pair of restraints but that comes with a price: $129.95 for the wrist restraints, $139.95 for the ankle restraints. What I would always recommend is going to your local kink store, try them out, get an experts opinion and buy what you feel comfortable with.


If you have any further question, you can always write me an e-mail, send me a tweet @ToyTorture or hit me up on Recon or PlanetRomeo at ToyTorture.

Rubber 101

About the material

The basic material of rubber is natural rubber which is harvested in form of latex milk from rubber trees (hevea brasiliensis). When drying this milk turns into natural latex. However in this form you can’t work with the material because it is very sticks, breaks under cold and will disintegrate under heat. In order to turn the latex milk into a usable material a process called vulcanization is applied to the latex using sulfur, pressure and heat. During this process the white latex turns yellow due to the heat and the sulfur. If another color is desired pigments are added during the vulcanization.

Material properties

Generally speaking rubber is a very fragile and demanding material.

Latex milk consists of long polymer chains with free molecule endings. This “free” ends will join with the sulfur inside the material under heat and pressure but will stay free on the surface. Usually oxygen will dock on these ends causing redox which will change to color of the latex or can even destroy it (how to prevent this later on when I talk about taking care of you rubber). Also this effect is responsible of the friction when you put on a rubber piece.

Other harmful influences are ozone and UV-light, reactive metals like silver and cooper, plastificantes, oils and fats (this includes deodorant and perfume!) except silicone oil and great force.

On the plus side there is the flexibility and high thermal conductivity. But rubber mustn’t be overstretched because than it will not return to its original form.

The thrill of rubber gear

I am often asked what attracts me to rubber. There are a bunch of different factors. First there is the smell, than there is the touch of the surface, the feeling of the material tightly wrapping around your body. It is hard to put into words why rubber is something special. At best try it on at a local fetish dealer and find out for yourself.

Why is rubber gear so expensive?

Until the 1980s rubber was widely used in hospitals for various purposes like mattress covers or catheter because it was an easy to clean and quite robust material. But with the availability of cheap one-time products the demand for sheets of rubber decreased rapidly. Nowadays sheets of rubber which are suitable for skin contact and well made enough for lasting long are nearly exclusively made for the performing arts and fetish industry which leads to smaller quantities being made and thus increased price.

With its elastic properties rubber is a material which can only be processed by hand so there is a large chunk of manual labor cost in the price which can hardly be driven down with scale effects. Add to that the usual pervert’s mark up and you end with the price of rubber gear.

How rubber gear is made

There are two major ways of making rubber gear: gluing and dipping. For dipping you dip a form p.e. for gloves, simple shirts or a mask into liquid latex, get it out and let it dry. The advantage of this the speed large numbers of items can be made but it is very hard to create an even material thickness.

For any larger and more complex items like suits, multicolor shirts, etc. the sheets of rubber are cut into pieces using patterns and glued together. There are manufacturers who sew rubber together but since this will cost elasticity I would not recommend it.

Another non industrial way of making gear is using liquid latex. You apply the liquid on the body and let it dry a little bit. This can be a nice and very sensual experience especially when done together but make sure that the body area is completely hairless! Otherwise you will rip them out when pulling the rubber off.

Choosing a Style

You can have nearly everything wearable made out of rubber starting with everyday attire over special play wear like suits with codpieces and zippers on important places up to super hero costumes. Since everybody has a different kind and preference I will not recommend something here. However I heavily advise you to not order your first piece over the internet without trying it on! On the one hand some things look better on you in your fantasy than in reality and it sometimes can be quite shocking when you wear your dream piece and it looks horrible on you. On the other hand normal clothes sizes don’t transfer one to one into rubber gear sizes. Depending on the effect you want to achieve – ranging from loose casual fit to skintight – you will need to find the right size for you which again can be a pleasant surprise (when you need an S instead of you usual L) or shocking (XL pants due to your thighs instead of M).

Choosing the Right Material Thickness

This is a tricky decision. Rubber clothing comes in material thicknesses between 0,18mm and 1,6mm which leaves you with a lot of choices.  The thinner the rubber, the better it will wrap around your body and the more you will feel touch through it. Also, thinner rubber is cheaper. However: It will tear more easily when you get stuck on something like p.e. a corner of the bar counter.

Thicker rubber is sturdier; when wearing it you feel the material presence much more and when you go beyond 1mm thickness on a made to measure piece the pressure it applies to your body can be an own kind of sensation during a bondage scene. Also I have made the experience that the thicker the rubber the more intense is the smell but that might be subjective.

But sturdiness can cause problems. The thicker the material to more draft is applied on the glue seams which are more likely to give in when moving a lot or with a lot of force.

Using Rubber

Due to the material properties it can be hard to get into rubber because it will stick to your skin. To prevent this use talc powder or silicon oil on the inside. Both will create a non-stick layer on the rubber. Also silicon oil is used to give the rubber the nice shiny look many rubber fetishists find attractive.

When playing in rubber mind the material properties. Too much draft will cause rips or hurt the glue seams. You will soon get a feeling what you can or can’t do in your gear.

Taking care of your rubber gear

As written above, rubber is a material which needs a bit of care.

Storing Rubber

Rubber is best stored in a dark place on a clothes hanger made out of plastic to prevent exposition to UV light and keep it from getting wrinkles. If you have gotten wrinkles into your gear try a mild dryer program. Sometimes this will get them out. To prevent it from redoxing soak it in silicone oil about once a month. Because especially thin rubber tends to stick together apply talc powder inside and outside on your gear.

Washing Rubber

After each usage wash your rubber with warm water and some form of soap. But yet again, make sure that you don’t use something with oils or perfume in it. The most basic curd soap, non-sented detergents or hyper allergic washing gel are good. There is a special rubber washing solution called Hexi Blue available which was once made for hospitals and is now nearly only used for fetish purposes. It has a bit of silicone oil in it so it keeps you from soaking your gear in it. However Hexi Blue is quite expensive and hard to get.

What if I am a lazy boy?

There is a solution for dealing with the stickiness and partly with the aging and the washing. You can chlorinate the rubber so that the oxygen on the free ends is replaced with chlorine. This will cost you a bit of latex smell for the first months and will alter the feeling a bit since it doesn’t stick to your skin anymore but has the advantage that you can put your rubber on like a cotton shirt, it will not age as rapidly as unhandled gear and doesn’t need instant washing after sessions or stuff put on it for storage. Also you don’t have to soak it in silicone oil as often as normal rubber.